Items in Basket Amount |
0
0,00 €
|
|---|

Water Faucets
Washbasin faucets, Bathtub faucets, Shower faucets, Shower columns, Shower panels, Kitchen faucets, Bidet faucets, Senzor faucets, Medical, Small Taps and Valves


Wall bathroom accessories
Hooks and hangers, Soap Dispensers, Toothbrush glasses and holders, Soap dishes, Towel rails & rings, Toilet paper holders, Toilet brushes, Bathroom Shelves

Free standing
Soap dispensers, Toothbrush glasses and holders, Soap dishes, Towel rails, Toilet paper stands, Toilet brushes, Jars, containers


Seats and stools
Folding seats, Stools, For seniors and the disabled, Children's bathroom step stools, anti slip


Senior program, Accessible bathroom
Handrails, Toilet handrails, Seats and stools for seniors, Toilet seats senior


Washbasin plates
Countertops AVICE, Countertops TAILOR, SKA Countertops, Plates VEGA, WOODY, Plates PLATO, MORIAN


Washbasins
Wall-mounted, Double washbasins, Countertop basins, Drop in washbasins, Semi-recessed washbasins, Small washbasins, Corner washbasins, Free standing washbasins, Custom washbasins, Washbasins for the disabled


Toilet with bidet
WC with integrated electronic bidet, WC with Bidetshower, WC with bidet shower and integrated faucet or valve, Additional bidet for toilets


Bathtubs
Freestanding, Rectangular, Eccentric left, Eccentric right, Back to wall, Oval, Corner bathtubs, Round bathtubs, Shallow bathtubs, With integrated panel, Retro baths

Shower trays
Square, Rectangular, Quarter circle, Eccentric left, Eccentric right, D-Shaped, Deep, Customized products


Hydromassage baths
Rectangular, Eccentric, Oval, Corner bathtubs, Round, Double ended hydromassage baths


Shower doors
Retracting, Folding, Opening with a fixed part, Opening single wing, Opening double wings

Square enclosures
Sliding doors - corner entrance, Folding doors - corner entrance, Sliding doors with side wall, Folding doors with side wall, Door opening - corner entrance, door opening with side wall

Rectangular enclosures
Sliding doors - corner entrance, Folding doors - corner entrance, Sliding doors with side wall, Folding doors with side wall, Door opening - corner entrance, Door opening with side wall


Walk in enclosures
Single wall fixed, Single-walled sliding, Single-walled round, Double-walled fixed, Double-walled swivel, Single-walled spatial

Wall shower enclosure
D shaped shower enclosure, sliding doors, 3 sides shower enclosures, sliding doors, 3 sides shower enclosures, folding doors, 3 sides shower enclosures, opening single wing doors


Accessories for radiators
El.heating bars, Connection sets, Towel dryers, hooks, Radiator pipe cover and Faucet hole, Clamping fittings, Other


Pre-wall/flushing technology
WC concealed cisterns, Flush Buttons, Bidet modules, Washbasins modules, Accessories


Bath tub
Standard, without filling, With filling, For freestanding Bathtubs, Drains, Siphons, Spare parts


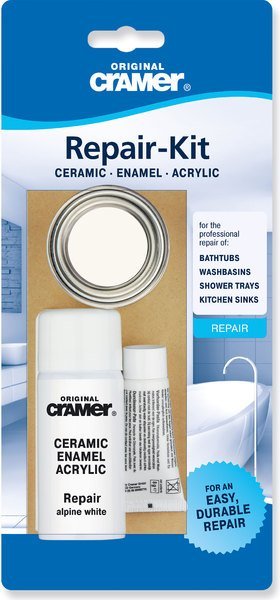
REPAIR KIT for Ceramic, Enamel and Acrylic, white

| excl. VAT | incl. VAT | |
|---|---|---|
| Your price / Piece | 36,00 € | 43,56 € |
|
stock > 100 Piece
Ovčáry u Kolína: > 100 Piece
|
| Order code | CA-16080 |
|---|
Description
Properties
| Brand | SAPHO | |
|---|---|---|
| Colour |   White White | |
| Weight / Piece | 0.173 kg | |
| Packaging | 1 Piece | |
| Warranty | 2 years |
Gallery